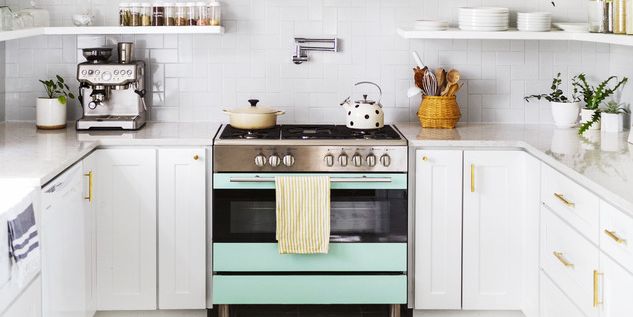
Retro kitchens are making a comeback, ushering in a surge in colorful appliances with personality. While you may be dreaming of a glamorous pink refrigerator or mint green stove, kitchen appliances are a big investment, especially if your current ones are still in perfect working order. That's why homeowners are turning to painting their major appliances, from washers and dishwashers to smaller appliances like stand mixers and microwaves.
If you've been scrolling through Instagram or TikTok lately, you may have seen influencers using a paint roller on their kitchen appliances. One such content creator, Krista McEwan, completely renovated her decade-old refrigerator, stove, and microwave for under $100. “I'd had my eye on white and gold appliances for a long time, but it was hard to find anything worth the price,” she says. “I'm so happy with the results. It's been a year and there's no scratches, peeling, or chips.”
If you're looking for a budget-friendly way to refresh your kitchen design, painting your appliances is a great idea to add a fresh splash of color. Or, you can give older appliances a coat of neutral paint to keep them in good working order for a few more years, saving you hundreds (or thousands) of dollars along the way.
Things to consider before painting your appliances:
From prep work to choosing the right paint, there's a lot to consider before tackling this buzzworthy DIY project. Here, Dan DiClerico, director of the Good Housekeeping Institute's Home Improvement and Outdoor Lab, shares his expert advice for making your home your own, stress-free.
Never paint a new appliance.
We don't recommend painting new appliances just in case something goes wrong. Older appliances that still work fine but look a bit dull are perfect for a fresh coat of paint.
Prepare the appliance.
After thoroughly cleaning the surface, lightly sand the surface with 180-grit sandpaper. Light scrubbing helps the primer adhere. The primer coat is key. Use a water-based adhesion primer such as Sherwin-Williams Extreme Bond Primer, which is designed for metal and other hard, shiny surfaces.
April House, a popular home decorator, recently gave her KitchenAid mixer a second coat of paint and also painted her laundry room mini-fridge. Her top tip is to be sure to prep the surface: “A clean, matte finish is essential to ensure the paint lasts.”
Protect the surrounding space.
Small appliances can be painted outside, but larger appliances (such as dishwashers and stoves) may only be painted inside. First, unplug the appliances. Remove all handles and badges, and protect floors and surrounding cabinets with tarps and masking tape.
Buy the right paint.
Enamel paint is the perfect finishing coat. It's specially formulated to dry to a durable, glossy finish. Perfect for the DIY enthusiast, enamel paint combines the ease of application of water-based paint with the hardness of oil-based paint to create a durable finish that repels moisture, stains and scratches.
Influencer Erica Stolman Dowdy painted most of a white washing machine a pretty pink color, using masking tape to section off the top. After it dried, she carefully peeled the paint off to reveal what she calls her “strawberries and cream washing machine.”
Don't rush the process.
This project is DIY-friendly, but to do it properly it will take up most of your weekend, especially since it requires drying time between coats. Tip: Using a paint sprayer can help speed up the project.
Alyssa Gautieri (she/her) is Good Housekeepingwhere she covers all things home and interior design. Prior to joining GH in 2022, she wrote for publications such as: Elle Decor, Chairish, Bob Vila, Unique Homes Magazine and Lodging MagazineWe also create product copy for home brands such as BrylaneHome and VIGO Industries.


